Prep for Deployment
Please review all preparation and deployment information prior to deployment (including viewing all videos). Pre-deployment electronics check should be completed 1 day prior to deployment, and final preparation can be completed ~ 20 minutes prior to deployment. Ensure the following steps are followed and completed to allow for a smooth deployment.
Pre-Deployment Planning
Complete 1 week prior to deployment
Weather
Examine weather (winds, swell, currents) on windy.com for your area to identify environmental conditions conducive for deployment and retrieval. You can also use the test deployments in Driftwatch to identify currents in your preferred deployment location. Under many circumstances, we will want to identify a weather window for buoy retrieval ~ 5 days after deployment.
Permits
If deployments will be in or near a NOAA Marine Sanctuary, submit information according to the instructions here.
Pre-Deployment Electronics Check
Complete 1 day prior to deployment
Soundtrap Preperation
Charge Recorder and confirm recorder settings
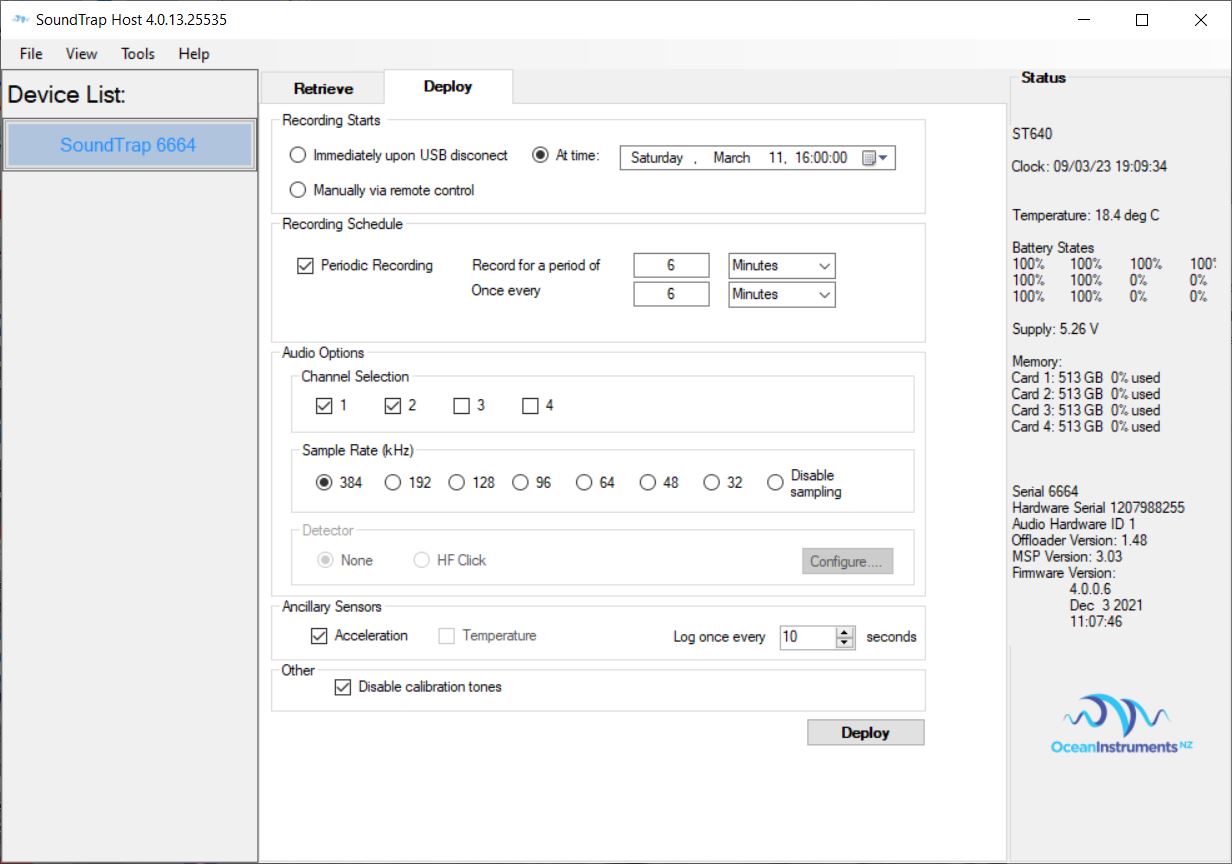
Recording Starts
We recommend selecting a specific start date/time when you expect the recorder to be deployed. While the remote control is very convenient, it can be very difficult to see the green light indictator (to show that you turned it on) on the ST4300, and it is impossible to see it on the ST640 (it is internal).
Recording Schedule
Select Periodic Recording. Record for a period of 6 minutes every 6 minutes. This will allow the recording schedule to be set to continuous sampling with 6 minute files.
Sample Rate
Select the maximum sample rate for the recorder (this varies by recorder)
Detector
DO NOT SELECT any detectors.
Ancillary Sensors
✓ Acceleration (Not temperature), Log every 10 seconds.
Other
✓ Disable calibration tones
Confirm the status of the Sound Trap after it is programmed
After a ST640 is programmed and disconnected from a laptop, the LED should flash red to indicate it is programmed to start at a later time. The LED will flash green if it is actively recording.
If the LED does not flash at all after the Sound Trap is disconnected, it must be re-connected to the laptop and re-programmed.
Clean Sound Trap O-rings and seal the unit
Remove O-rings and clean the gaps. Replace the O-rings if any irregularity is found. Apply a thin layer of lubricant to the rings.
Close the unit, and tighten the screw until it resists. Then unscrew it just a hair to be sure.
Apply a layer of plumbers tape (roughly 3 layers thick) around the crease, and ensure the tape settles into the crease.
Apply a layer of self-sealing tape. Cut roughly 6 inches off the roll and tightly stretch it around the outside, covering all of the pipe tape.
Secure in place with electrical tape, covering all of the self-sealing tape.
Greasing SoundTrap/Hydrophone Connectors
Grease the SoundTrap sockets prior to connecting it to the hydrophone array
Apply a layer of grease to the socket. Ensure all sockets are completely sealed with approximately 30% of the hole filled, and leave a transparent layer of grease on the socket face
Connect the hydrophone array plugs to the SoundTrap sockets and remove any excess grease from the joint
Firmly attach the locking sleeve
See links below for detailed greasing protocol (steps with pictures and video)
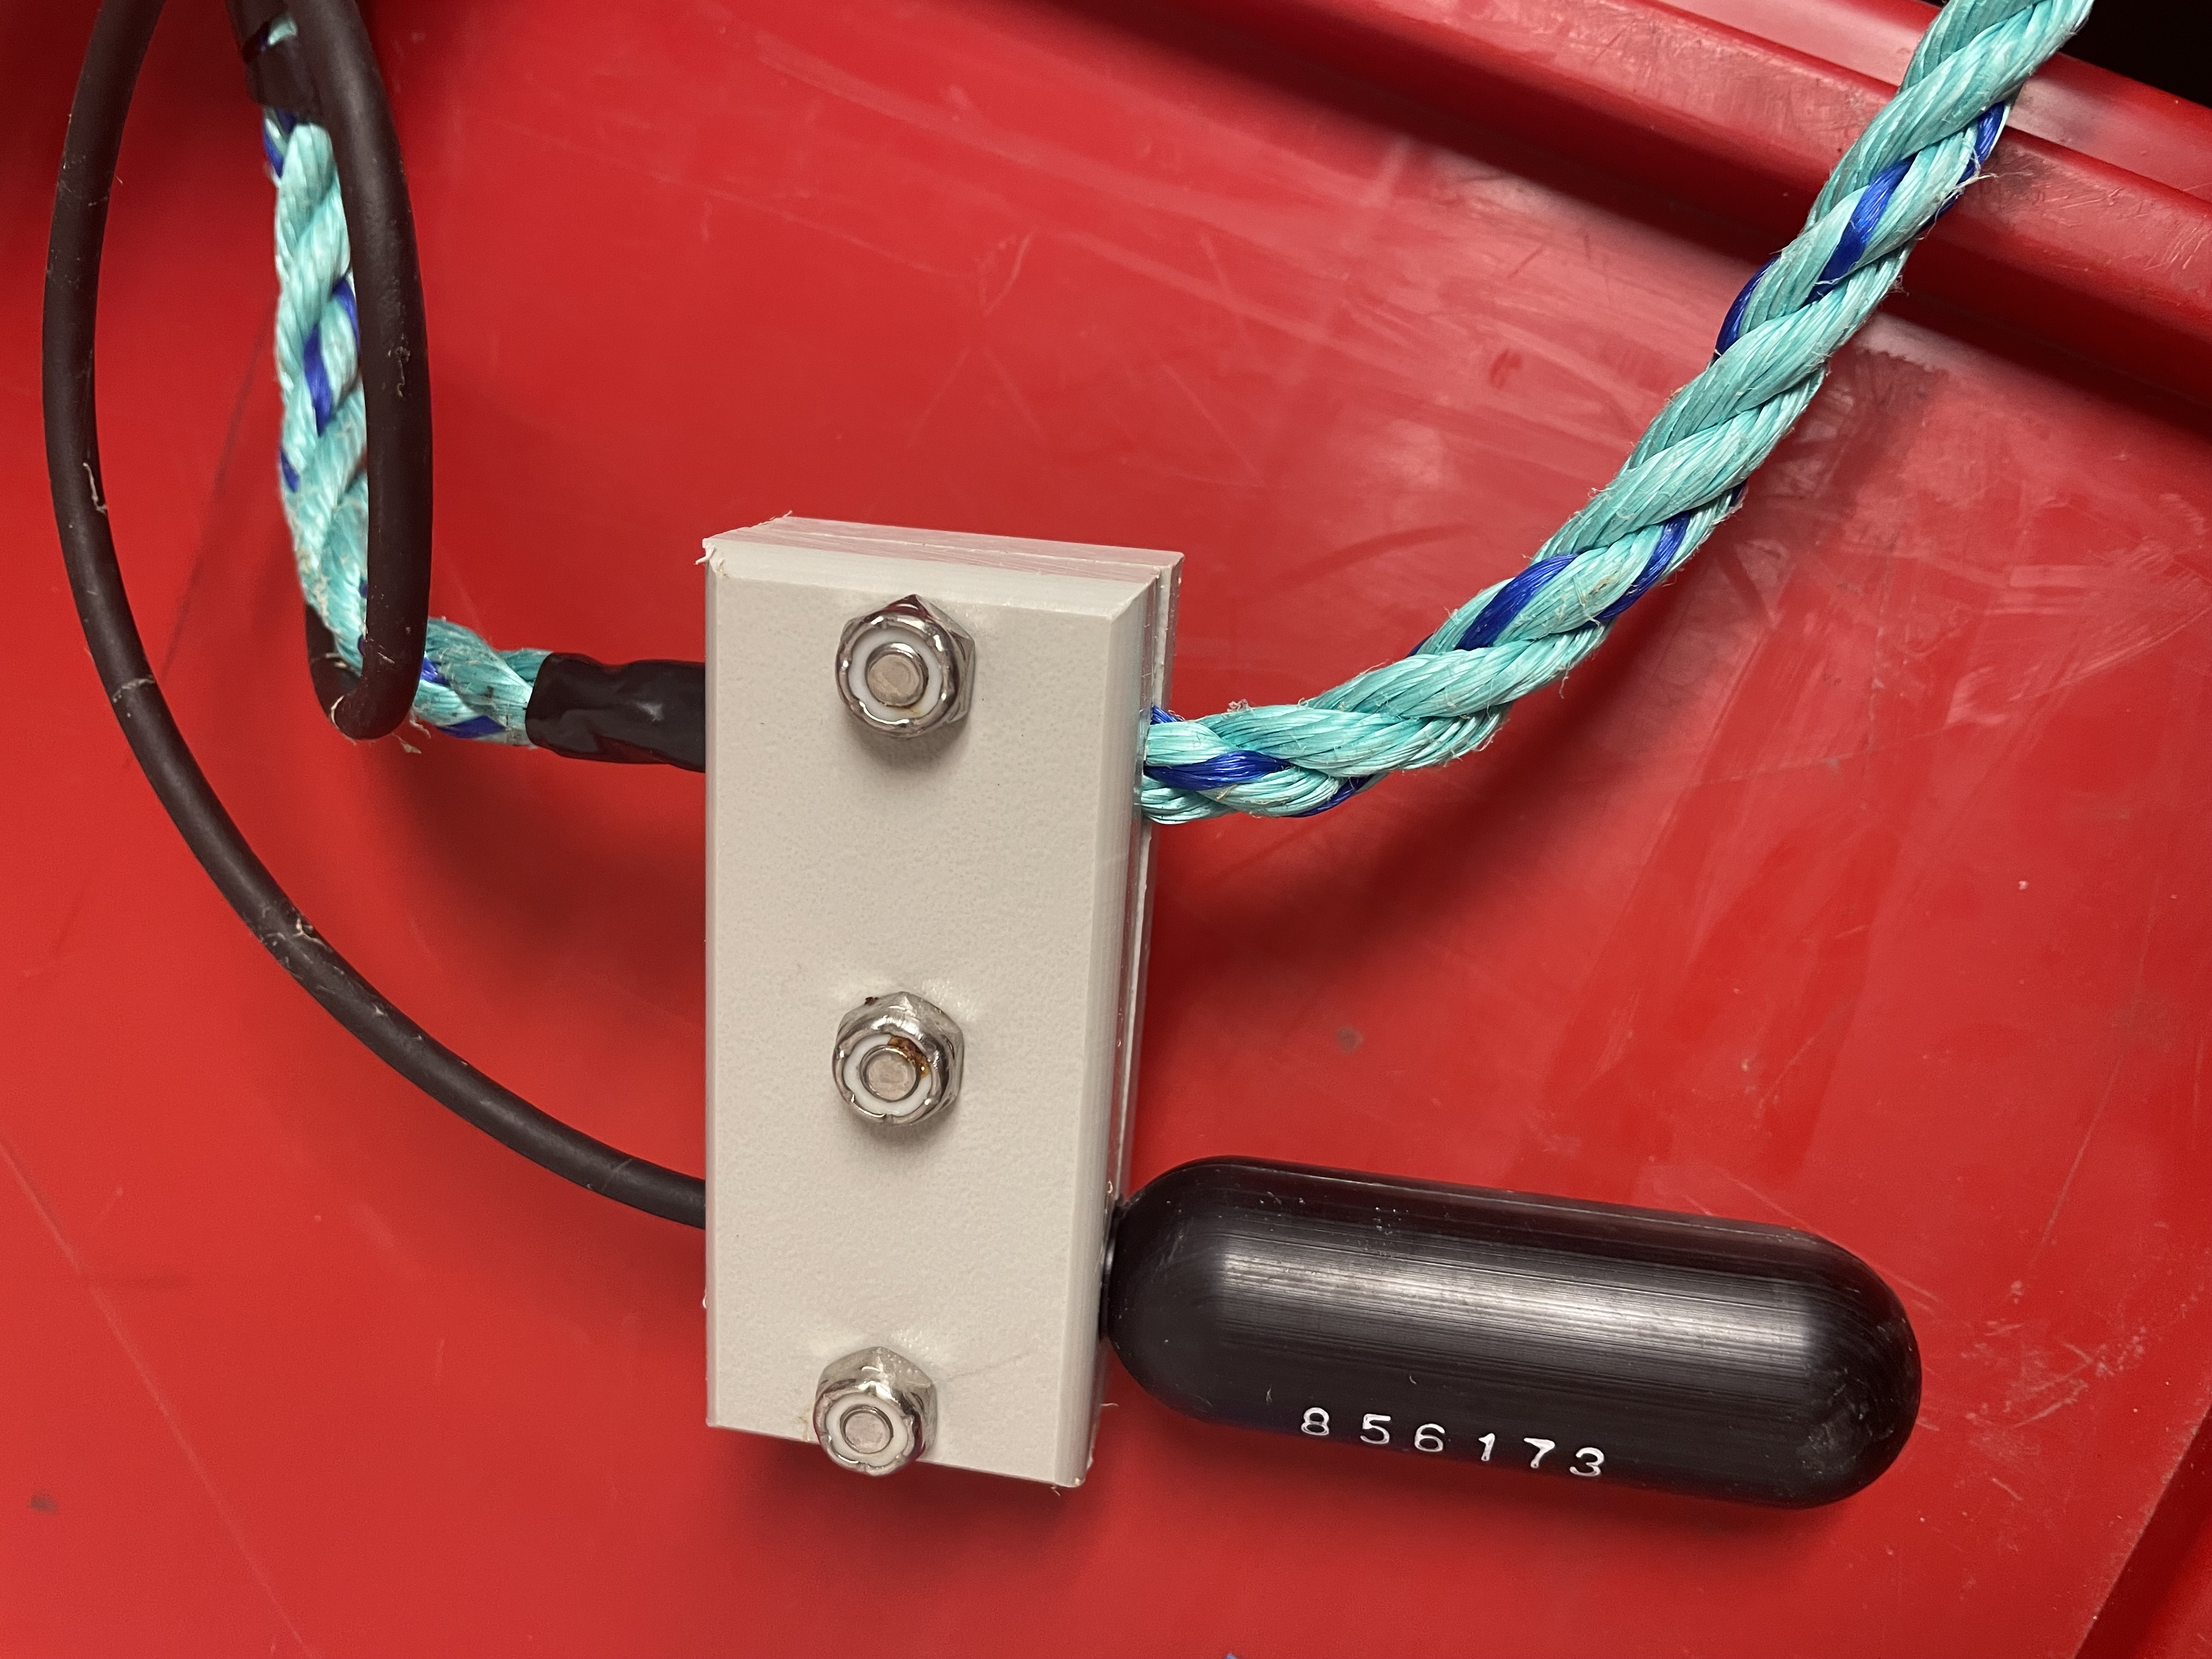
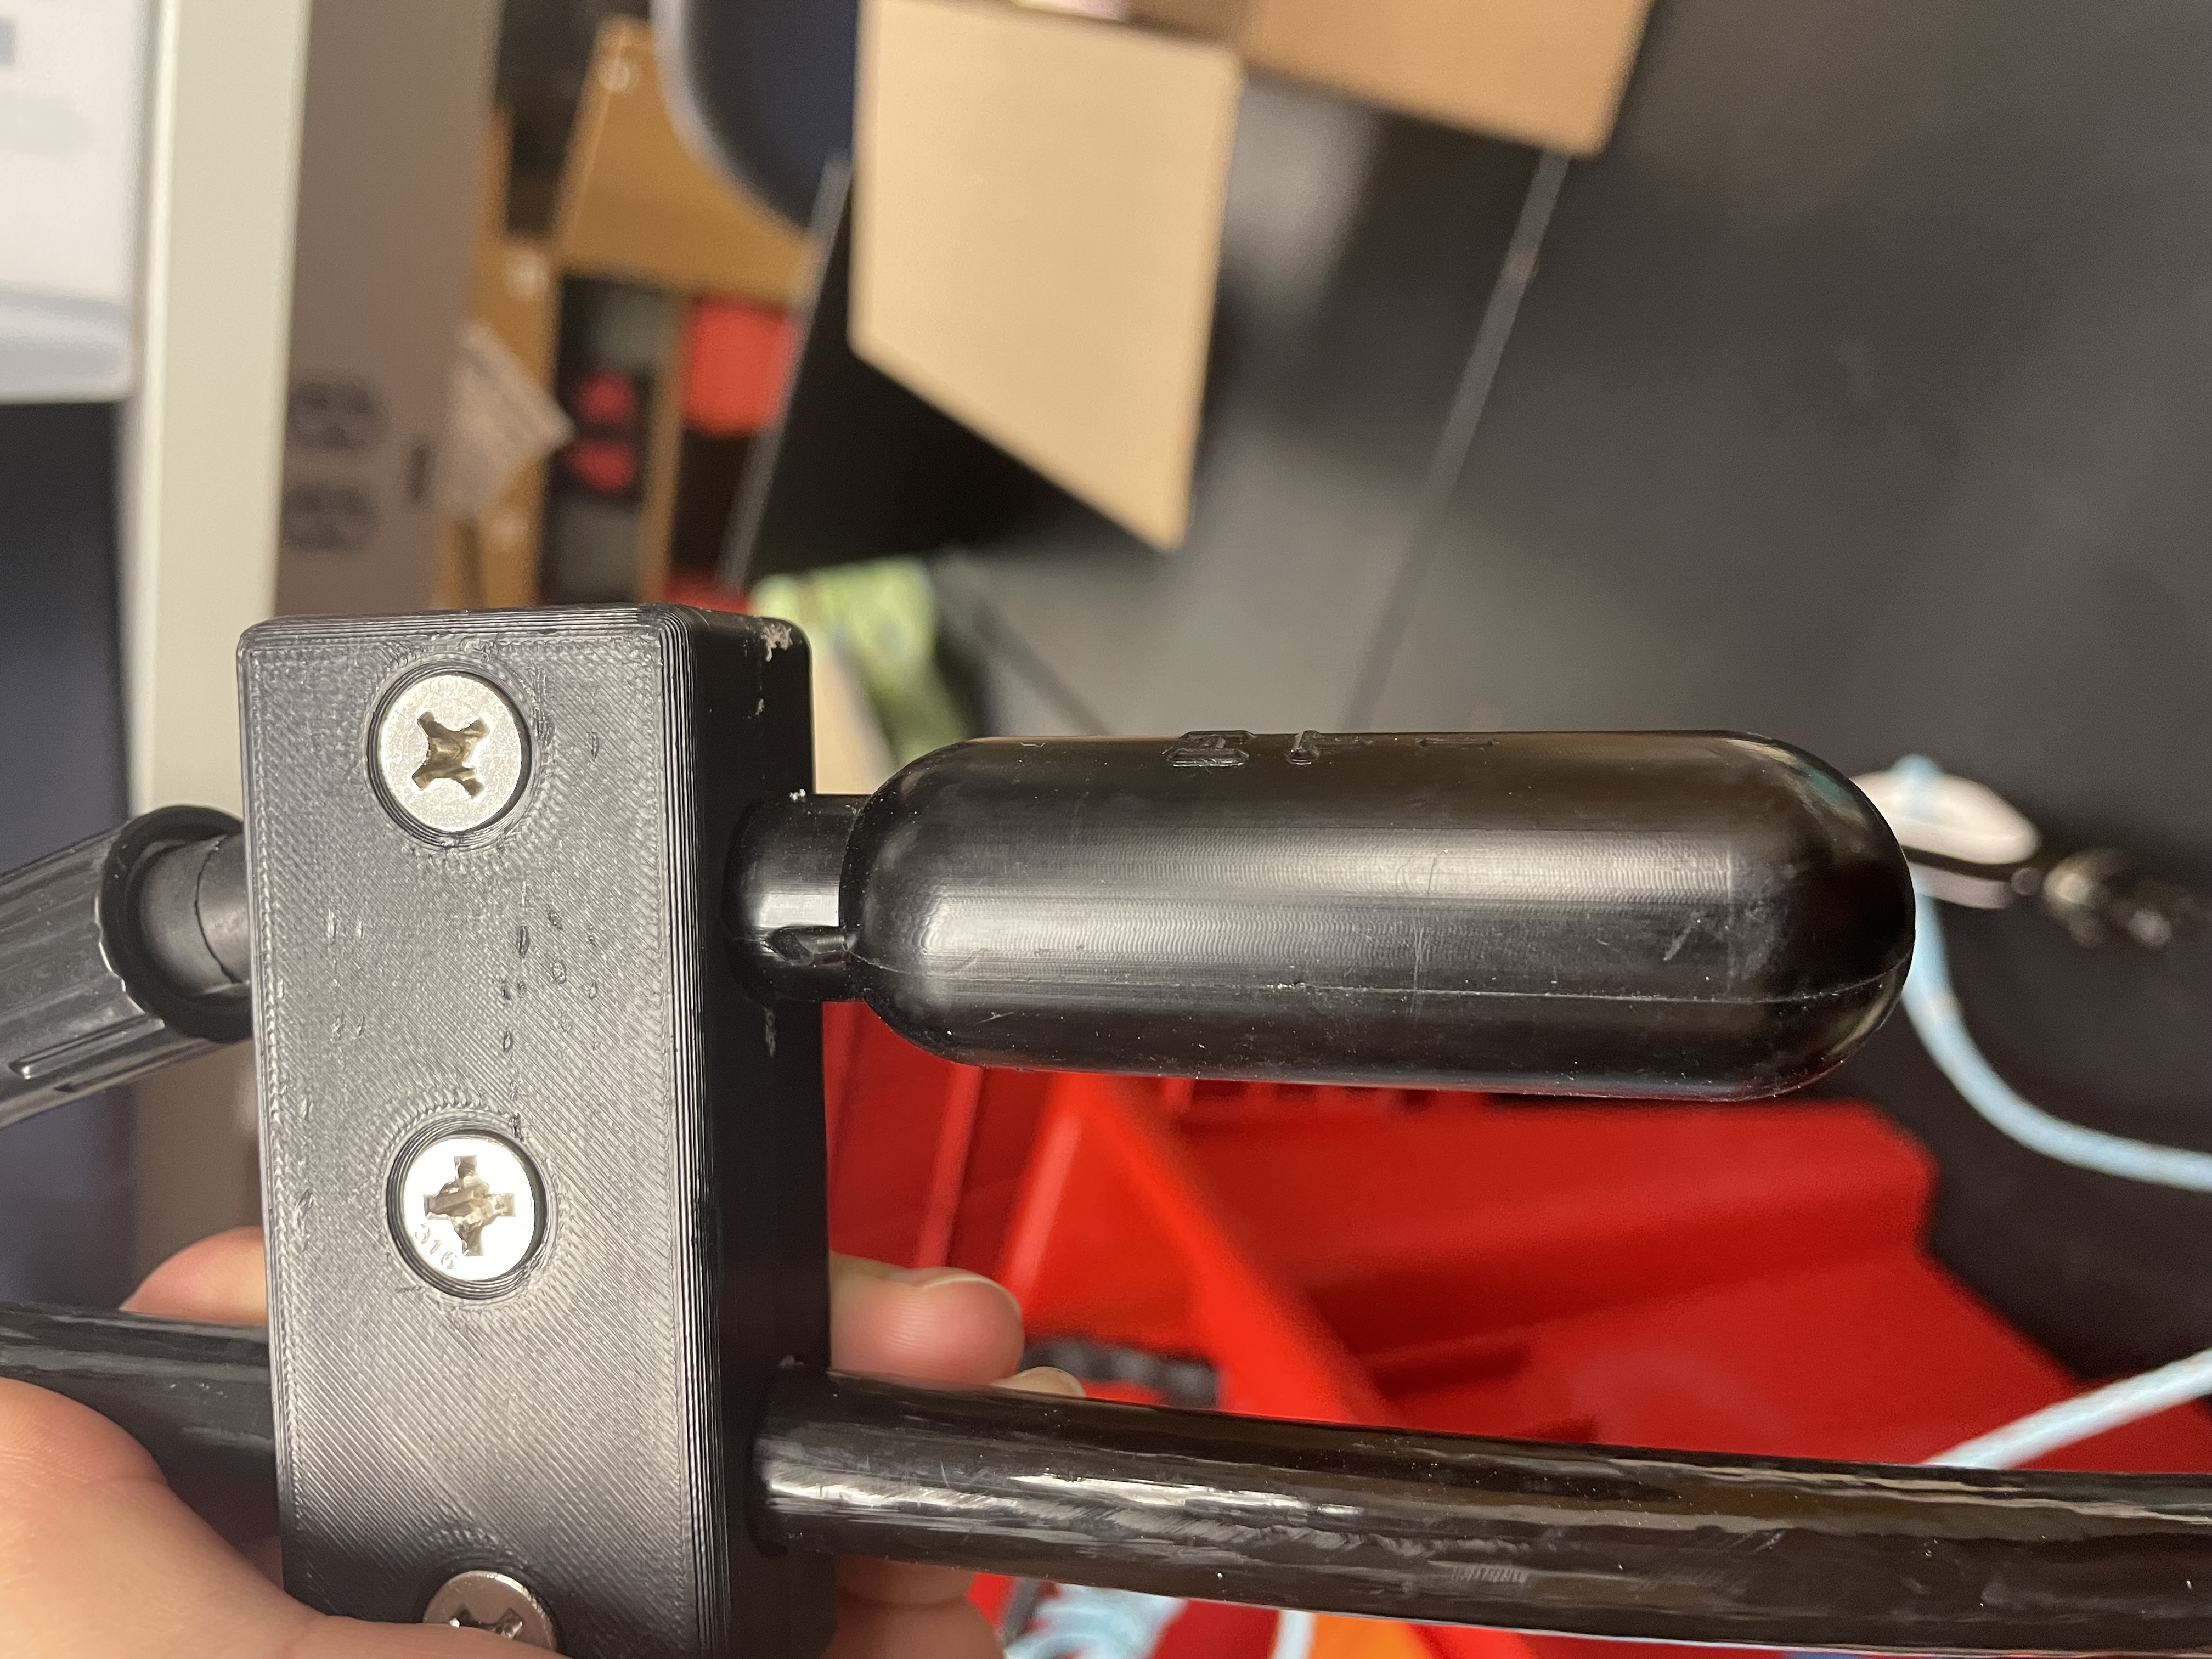
Securing Hydrophones before next deployment
Over time, the hydrophones may become loose in the array mounts leading to noise in the data
If the hydrophone is loose, tighten the bolts and nuts or remove the mount and reposition the hydrophone
Some hydrophone models may fit into the mount better, but all should be tightly secured and not hitting the surrounding array parts
- Grey mount
- Black mount
Check Solar GPS
Place solar GPS in view of sky (satellites) and remove magnet
Check online to ensure that the solar GPS is being updated (check with ADRIFT team to obtain login information)
Set up Driftwatch auto-text update (if desired).
Final Deployment Preparation
Complete >20 minutes before deployment
1. Assemble High Flyer for deployment
Attach solar GPS to GPS Mount on High Flyer (zip ties)
Remove Magnet on solar GPS
2. Lay out the entire array on deck to make sure there are no tangles
- If you can’t fully lay it out, you can remove the bottom portion (including the array and the anchor) and the top (top trawl float), then loosely flake the line into the tote, starting from the bottom end closest to the array.
CAUTION - this line does tangle easily and you want to ensure there are no tangles or knots while you are trying to deploy the buoy
3. Attach the locking carabiner on the orange line to the High Flyer using the bridle, and lock snugly.
4. Attach the anchor (30 lb river anchor) to the bottom of the array using a bowline and zip tie to secure the knot.
5. If Soundtrap was programmed to turn on by remote, then turn on
Point remote at clear end of Recorder, press START
RED will light, then GREEN will light, then GREEN will blink 1x/4sec (hard to see in direct sunlight).
After 2 min, will go into SLEEP MODE, and will flash briefly every 20 min (hard to see)